
Saturday, September 21, 2019
Felted Bowls
Bringing in the Autumn with fall colors. Joined in a KAL (knit-a-long) on our group in Fiberkind, a great crafting community , come check it out! Knitted these wool bowls then machine washed for the felting process. They knitted up fast using a # 11 circular needles. Wool of the Andes ,100% Peruvian wool from KnitPicks along with their Pattern. Very easy and fun project.

Friday, August 16, 2019
Eco Botanical Printing Experiments
The last couple of days I've been experimenting with printing leaves and flowers on cloth. Its a whole new craft that so far has been another one of my favorites. The successes and failures and surprises are all part of the learning process. With the help of the experts on FB groups and YouTube I should be on my way with eco botanical printing.
I first gathered some old rusty iron objects , nails, door hinges, hubbies stuff in his "he shed" ; ). Loaded a jar with the iron, cup of vinegar topped with water. Suppose to wait a week or so but I just could not wait. I tried a silky (not real silk) cut of fabric for a scarf. A day later after the iron soaking I foraged the gardens and woods for maybe printable plants. Dipped them in vinegar then a iron dip. It was already strong ( I highly recommend gloves) my finger tips turned brown fast and you really need to protect your skin from this type of solution.
The iron brings out a black print so that can be adjusted to a weaker bath with more water. It will take several testing to get the right look.
My first project I rolled the scarf around a stick and tied it tight with fabric strips, submerged this in boiling to simmering water for almost 2 hours. I did unroll right out of the pot (could not wait) and seen that I had a muted print with some of the leaves showing a nice print. The rose leaves did the best. I do plan to add some wool to this scarf and finish the edges.

This next project just got out of the pot and sun drying on the porch before I wash it. This was done a little different then the scarf. I used a new cotton dish towel that I hand washed (scour). Using walnut leaves that I dipped in the iron ( I will not do that on the next one, to much iron). On one half of the towel I laid the walnut leaves then an iron blanket on top (I used paper towels soaked in the iron solution). Adding the leaves on top of the iron paper blanket , then flip the other half of the towel making a layered arrangement. Rolled on a stick, tied then steamed this one instead of a water bath. It suppose to make halos and sharper images. About a couple of hours steaming.


Well its a start with so much to learn and experiment, adding colorful flowers and learning what types of leaves , flowers, plants will work the best for sharper prints. The muted looks are beautiful as well. I can do this on wool so the sky is the limit. Give it try, gather those leaves and flowers, grab some rusty iron and wear those gloves. Most of all have fun!
Glad you dropped by
Linda
Monday, August 12, 2019
Ribbon Work Uncovered
I was cleaning out my work shop (I work for wool) : ) and uncovered a fun craft that I started last year, ribbon embroidery. Its a beautiful art and very relaxing. I use silk ribbon and embellishments and even watercolor for the backgrounds. On the silk ribbon I use permanent markers that can bring out a range of color plus shading and highlights.
These are some of my practice pieces along with a little bag I made.


This stand is perfect for holding embroidery hoops, even for painting. Its great when you want to watch a good movie and do artwork at the same time. Or take it outside!

This is a small corner in my workshop that is used for sewing, embroidery, quilting, beadwork, tatting and a nice library on the side (not shown b/c the books are not neatly organized yet) that holds inspiring reference books and also my herb and gardening books.

It doesn't matter how small or large a workplace might be, as long as it inspires you to give things a try. Don't do like I did and cover up your gifts!
Thanks for dropping by. I got some wet felt pieces I did over the weekend that I plan to share soon!
Linda
Wednesday, July 24, 2019
Weaving and Knitting
Finished the table runner that I wove with salvage ends of drop cloth. The picnic table is 7 1/2 feet long and the runner with fringe just touches the ends. If I do another runner for that table I'll add more warp length so it will hang off the table ends.


Off the double pointed needles this week is a pair of lace socks. Yarn is 75% Merino wool and 25% nylon/polyamide from Webs-- Huntington by Valley Yarn/ color-Arctic. I'll probably start up another pair of knitted socks in a couple of days for holiday gifts for my girls. Then I need to work on hats and mittens. The boys will want some knitted things too!

Thanks for stopping by,
Linda
Friday, July 19, 2019
Whats on the Loom!
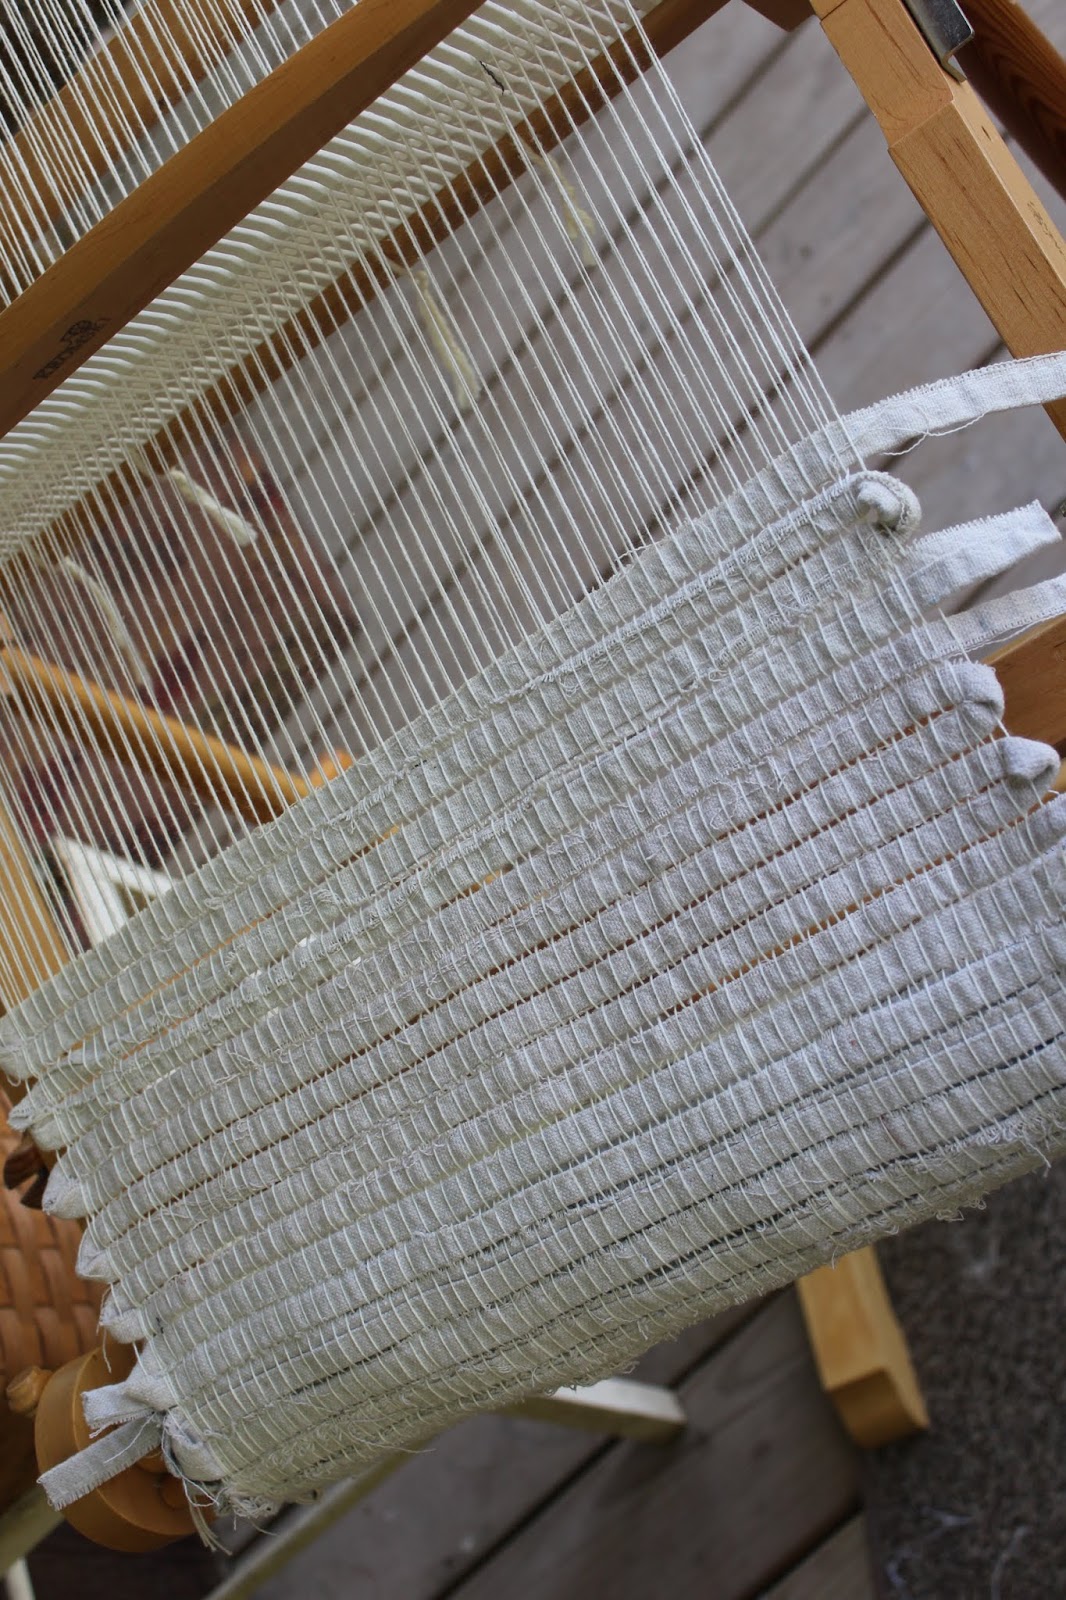
Theres been a project on my loom way to long and that's the problem, its a long table runner. I'm using the salvage ends of canvas drop cloth with raw edges and all one color. Its rough but its the look I want for the outdoor picnic table. Hope to finish it up this weekend.
With a nice summer breeze on the fiber studio porch and ice cold lemonaid with lemon mint I think I might get this done soon. I so want to get another project going with more color. Learn a new pattern on my Kromski 16 inch rigid heddle loom.
Its fun working with art yarns that I have spun up, using silk, sari silk ribbon, dyed wools and lots of embellishments to add to the weave. A 32 inch loom would be nice for making rugs and a smaller 10 inch loom for scarves. I'm checking into the Ashford Samplet with a 2.5 dent heddle, perfect for the art yarns.


Enjoy the summer days!

Thank you for your visit.
Linda
Wednesday, July 17, 2019
Wet Felting Projects
I love wet felting, using resist and needle felting for details. I recycle bubble wrap from books I order when hand felting. Marbles for resist that can make a felt project look like something from the ocean floors. Lots of things can be used for a resist. This helps with making 3D projects, and great for making handbags. So many art techniques that I have only touch the service.
My bags and hats, I first knit with wool then in the washing machine for the felting process. Its fun to see a huge knitted bag felt down to a nice size handbag.


My bags and hats, I first knit with wool then in the washing machine for the felting process. Its fun to see a huge knitted bag felt down to a nice size handbag.


Felting on cheese cloth

Wet felting pictures


Flowers to add to purses, hats,scarves, broches, etc.


Experimenting using a resist


I can't wait to get started again this season. There's a couple of felted purses I need to add the hardware and maybe some ribbon embroidery.
Its fun and very easy to do, get your felt on and give it a shot--its all art!
Thank you for dropping by
Linda--Fiber Passion
Friday, June 28, 2019
Fiber Art Adventure
Welcome to my first blog post on fiber adventures, here's my story, short and sweet.
It started with knitting socks-lots of socks. Knitting with beautiful commercial yarn to thinking I can make this so wool-lots of wool was in order. Well I needed to card the wool then spin , a spinning wheel came along and then a loom. More wool, more everything. Then our home became a place where fiber and tools lived. So the sheds came along and made things so much better and organized. One a fiber studio and the other a dyeing shed. Here's a few pics of the sheds and then get down to the business of fiber!
The Fiber Studio's


Dyeing Shed


Thanks For Visiting!
Linda
Subscribe to:
Comments (Atom)